Okay cold weather friends.
Are you ready?
Is your flannel washed and dried.
Let's go...
 I had to iron my flannel.
The fact that iron and flannel are in the same sentence freaks me out. But I'm taking one for the team.
Open up your flannel.
Line up the edges.
Fold it in fourths with the crazy frayed edges together.
This makes the ginormous piece more manageable and gives you less to cut.
You will be only cutting out one flannel backing at a time.
Smooth it out on your ugly table.
Carefully, with sharp scissors cut the flannel the same width of your scarf. I tried to do this with my rotary cutter, but the piece was just to big. Be sure not to cut your scarf, or to let the scarf move. They need to be the exact same size.
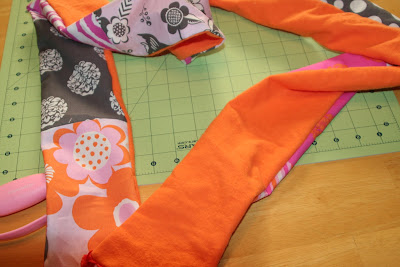
 Now unfold the long piece of flannel that you just carefully cut and lay your scarf right side down on top of it.
 Put a pin through both layers every square or so.
You might have a lot, or a little depending on how much yours shrunk.
I am not a fan of letting fabric go to waste.
If you are making all cozy scarves you might need to go buy some more.
Uphill. Both ways. In the snow.
Sorry.
I'll be sunbathing as you dig out your car to go to the fabric store.
The fun side in.
Pin liberally.
Use about a 1/2 inch seam.
Start in the middle of one of the sides.
Line it up with the right side of the foot.
Put the foot down.
Sew a few stitches, backstitch a few stitches, continue sewing down the length of the scarf.
 When you get to a seam where two fabrics are joined, make sure that the seam lies flat under the foot. Bunchy seams mean bunchy scarves.
Sew slowly and stop near the edge.
Roll the needle down with the right hand big knob, lift up the foot and turn the fabric.
Breathe.
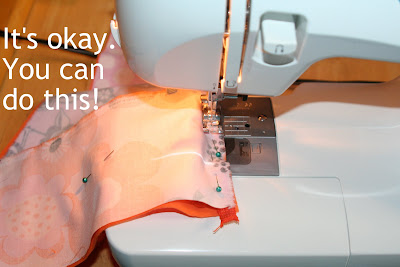
Here is the only tricky part.
It will want to get in the way.
It will want to make you cry.
Don't let it win. Press it to the side with your fingers. Sew slowly. Take out pins as you go. Don't sew on top of them. Just make sure that you don't go too far to the right. You need to sew through all three layers.
When you get to the corner, put the needle down. Foot up. Pivot the fabric.
Keep sewing up the other side of the scarf, turn at the corner, conquer the other side of trim and start sewing down the other long side.
This will be where you turn the scarf right side out.
When you stop don't forget to backstitch.
How cute is it?
Make sure to iron in the opening that isn't stitched yet.
Almost done!
 Take your freshly pressed scarf. On the middle of one side, line it up with the right side of the foot.
Move your needle all the way to the right.
Change you stitch length to 4 or 5.
Now this part is called topstitching.
It keeps the scarf together, closes the opening and makes it cute.
Sew a few stitches, backstitch.
Sew all the way down, stop and turn at the corners, meet up where you began and backstitch.
Now you are done.
Cozy.
Happy.
Done!
Do you love it or do you love it?
Tonight while you are curled up on your couch, grab a needle and thread and make some yo-yo splendor to adorn the end.
Cuteness turned up to eleven.
Good job cozy students!
I give you all an A+++!


Yoyo's? AHHHH! LOL! It looks super cute, though!!
ReplyDeleteyeah. people will be getting these for Christmas. thanks. :)
ReplyDeleteYaY! Now I just need to clear the kitchen table and ignore the messes everywhere, so I can sew! Thanks for posting!
ReplyDeleteLOVE!!! Totally doing flannel. And the YoYo? WowWow!
ReplyDeleteahhh! scared! can't wait!
ReplyDeleteI have my fabric but I haven't started yet. I had to see all the instructions to get a plan in my head (yeah, I'm weird that way). It is too easy! Thanks so much for the tutorial! I can't wait to get started!
ReplyDeleteI just wanted to say THANK YOU!I love the idea of doing this and I would have never known how to attempt this on my own. You have made it seem so easy! Anyway no doubt you had many more ways you could of been spending your time I just wanted to let you know that this is one chick that is glad you took the time to do this! Thank you, Thank you, Thank you
ReplyDeleteWoohoo! Lets rock this piece! hmmm..that was really dorky. :0)
ReplyDeleteI am so excited to finish these up. I snagged some minky instead of the flannel. I am nervous about it sliding around but I am DETERMINED to beat it! Wish me luck.
ReplyDeleteThanks so much for taking the time to put this together for us sewing challenged.
Julie -- please explain the part where we fold the fabric into fourths. I'm confused. Are we just doing that so we don't have to cut the entire length of the scarf? Or are we cutting 4 pieces of flannel backing for 4 scarves? That part is throwing me for a loop... Hope my question makes sense. Thanks!
ReplyDeleteThis comment has been removed by the author.
ReplyDeleteTexas Gal,
ReplyDeleteGreat question!
I folded it into fourths to make the actual inches that I had to cut with scissors shorter. It is just too dang long if it is stretched all of the way out. When it is folded into fourths you still will only be cutting one scarf backing at a time...
Cari,
ReplyDeleteI am not friends with minky, although I really want to be.
I just heard a great trick which I am totally going to try.
Get some iron on interfacing at Joann's...
iron it on to the back of the minky.
then use your minky as planned.
It makes it behave and not be so slippery and crazy.
Hope the tip helps. Let me know if it works.
Holy cuteness, now I want a cozy scarf. With a yo-yo. Love, love it!!
ReplyDeleteJust wanted to say I loved this tutorial. So excited to finish! Picking up my flannel tonight. THANK YOU!!
ReplyDeleteThanks Julie! There are 3 of us working on this together so you helped all 3 of us -- you ROCK! :)
ReplyDeleteOnce again.. I'm so late. But I just finished my first cozy scarf this morning. Love it!!!!!
ReplyDeleteThanks for the tutorial. I think you are right.. it all seems less scarey now!
I know I'm seeing it a year late ;-) but thanks for a fabulous tutorial! I had been eyeing some of these fabrics for another project but decided against it due to the size. However when I saw this I rushed to the store yesterday and grabbed 9 prints! I had to buy 1/2 yards so I actually got 11 scarves and they are all pressed and ready to put different backings on for Christmas gifts! They are beautiful! I used the leftover fabric scraps to make little matching zippered pouches-so cute!
ReplyDeleteI love sunshine, happy people,too~ Your blog make me learn a lot! charmingdate scam
ReplyDelete